When I was walking one day recently on Rayleigh Mount – my local green space, I was saddened and dismayed to see that large swathes of wildflowers, nettles and brambles had been suddenly and crudely cleared away with strimmers. It was early May – and only the previous day I had been captivated by the beauty and abundance of the cow parsley, buttercups and dandelions growing wild on the “bailey” level of the Mount. Rayleigh Mount is owned by the National Trust in the UK and is the site of an ancient castle. Of course, it is of archaeological importance and interest, but the castle has long since gone and this small site in the centre of a busy town has become a vital refuge and habitat for many species of wildlife and plant life. Just minutes from my doorstep, you will find me walking most days around this “hidden gem” of green beauty. On stepping through the gate and walking down the path, the sound of car engines quickly fades and is replaced by birdsong. Look around, and you will be guaranteed to see blackbirds, song thrushes and robins in abundance, industriously searching for food at ground level; wrens skulk amongst the brambles, belting out their song at incredible volume, blackcaps, goldcrests and dunnocks are plentiful. In early spring, you’ll be sure to hear greater spotted woodpeckers tap-tapping high up in the trees.


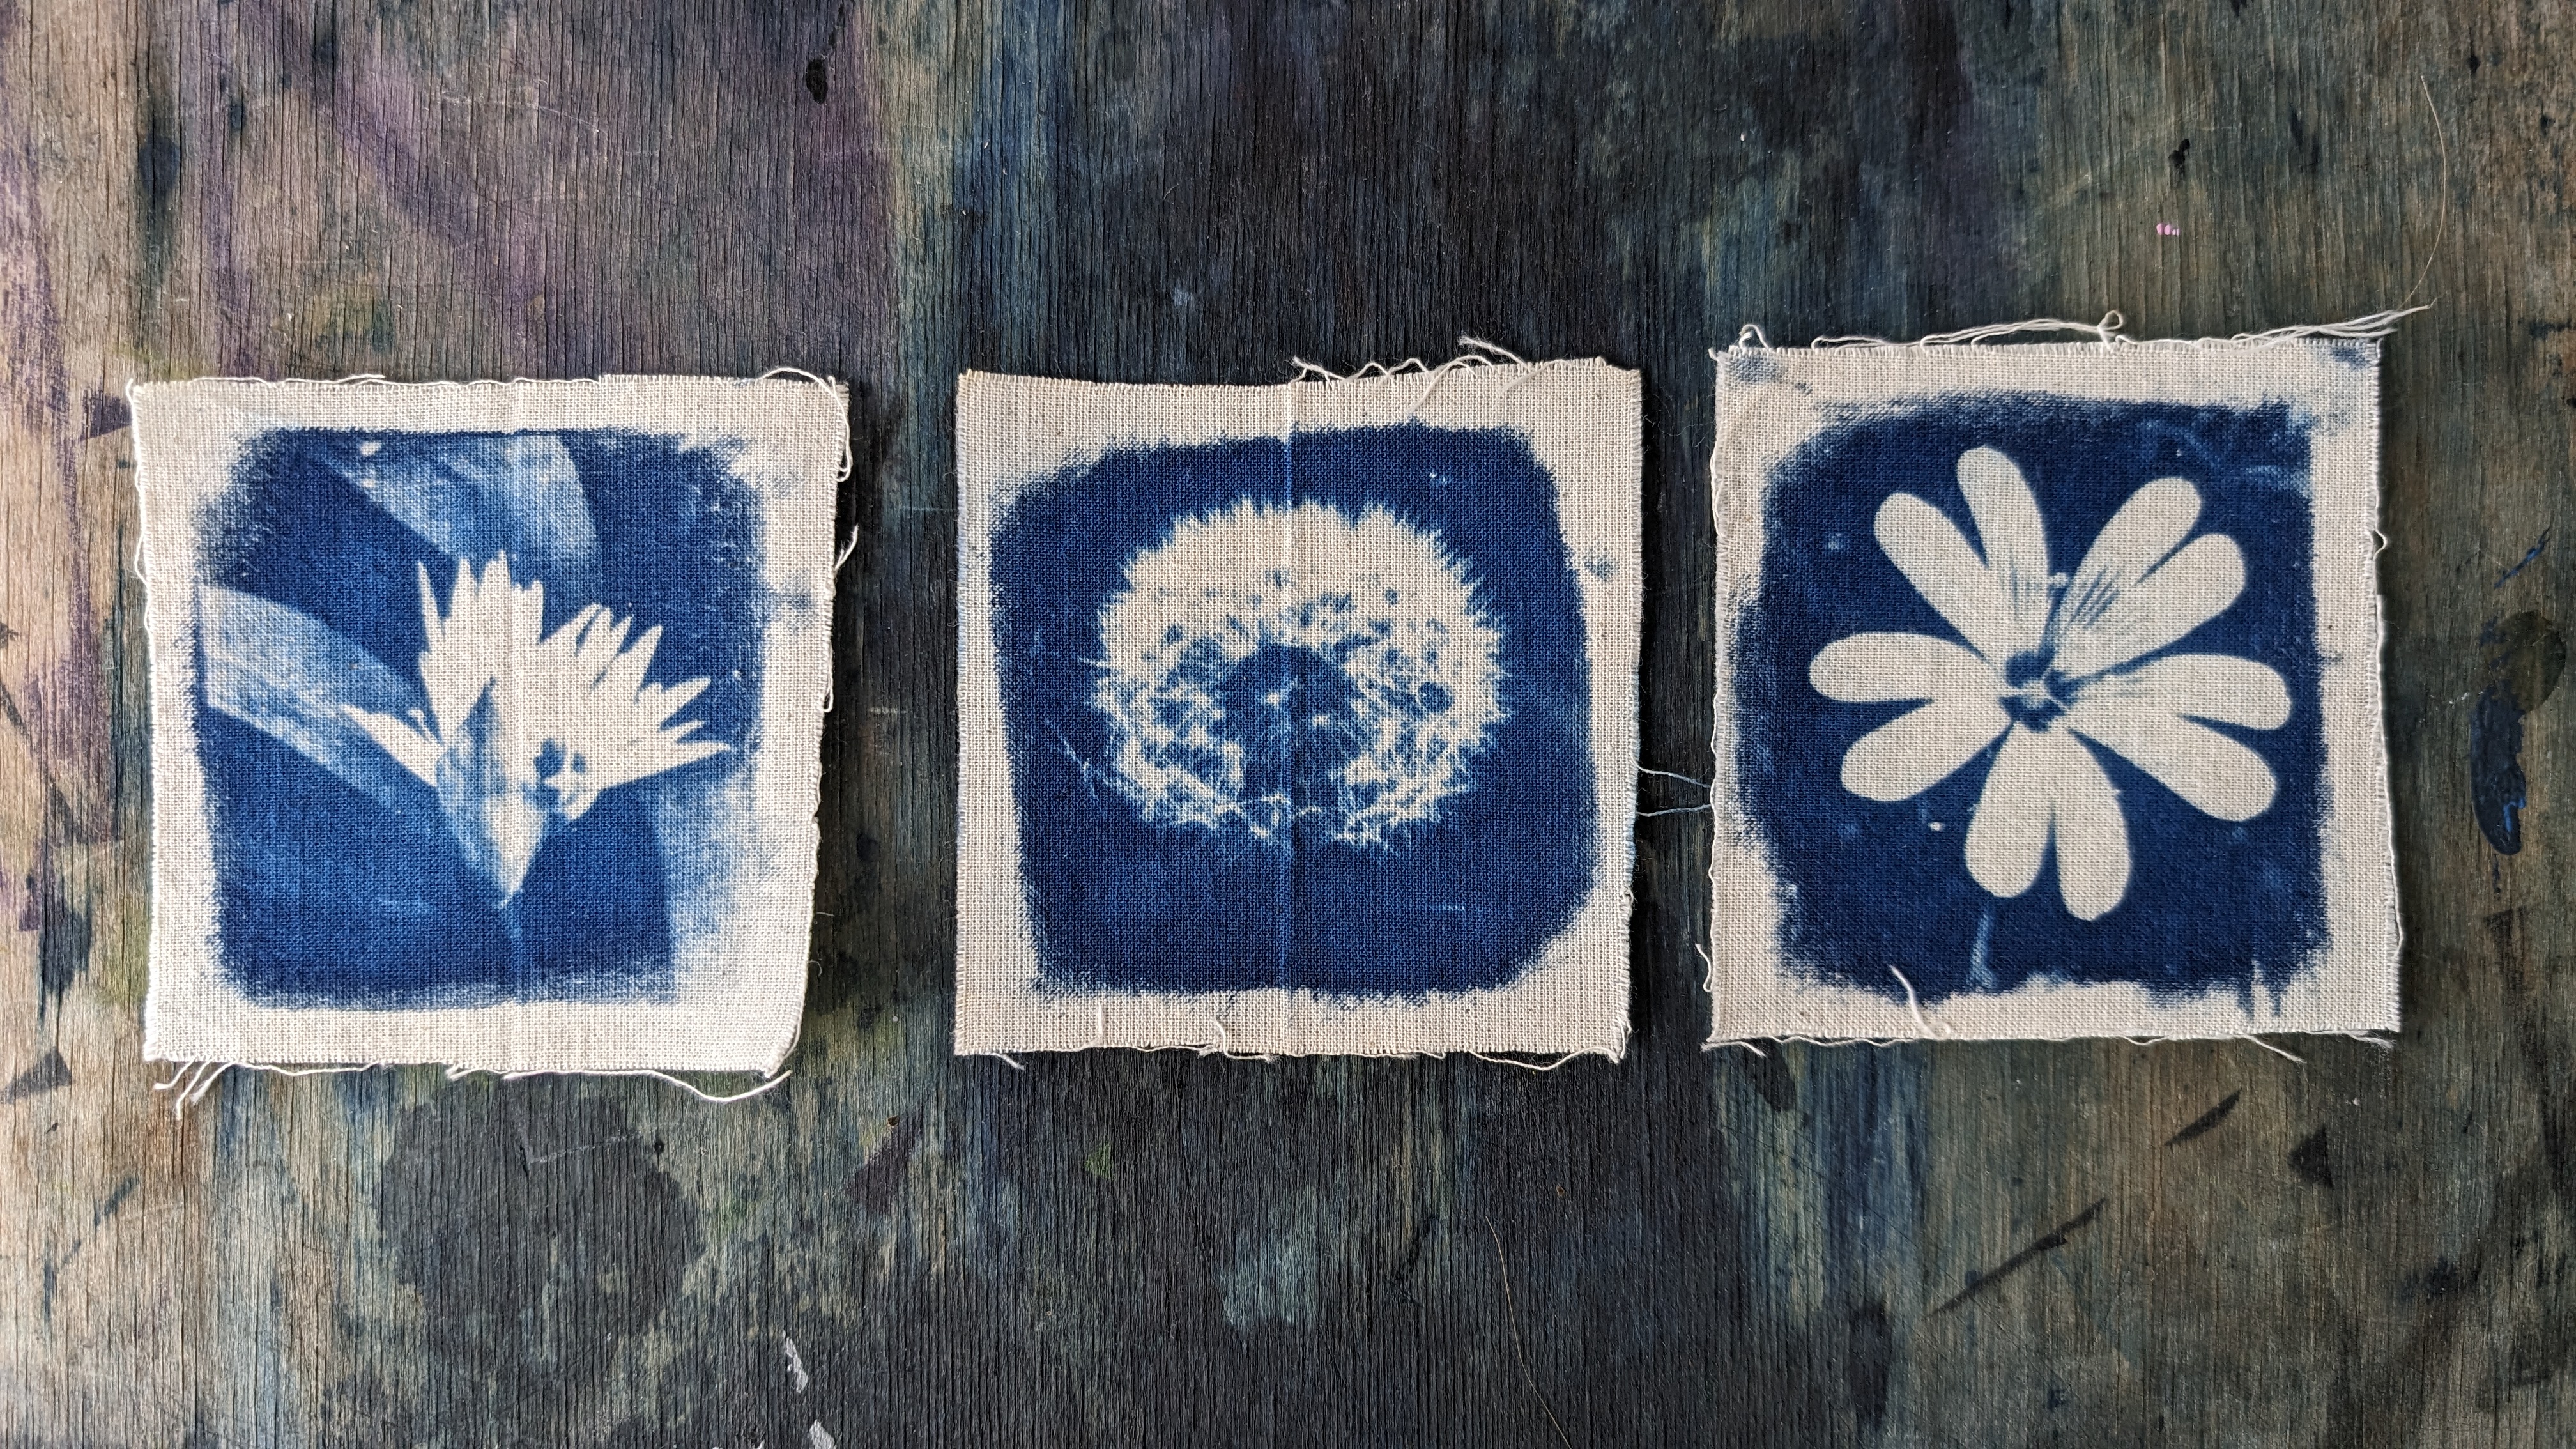
Much of where I live in south east Essex is built-up, with an overall lack of wild green spaces (unlike the north Essex/Suffolk border) – so I consider myself lucky to have a space like Rayleigh Mount so close to me – it has become a huge source of inspiration for my art in the four years since I moved here. The wanton removal of the wildflowers in “no mow May” was a shock (perhaps naively) to me and I felt compelled to embark on a project to preserve some of the fragile memories of the beauty which I have probably been guilty of taking for granted. Simply entitled “Wildflowers Grew There…”, I have begun making a series of cyanotype prints on small squares of cotton calico, of the wildflowers I’ve been capturing with my camera phone during my many spring and summer walks on the Mount.
Through sharing my processes in my social media posts, I know that many of you are interested and love the process of cyanotype, so I thought I’d share some insights on here of how I’ve begun to work on this project.


I use negative film images for the vast majority of my cyanotype prints. Using the photographs I take with my camera phone, I upload them to my computer, where I edit them on Photoshop – making them greyscale before inverting them to make negative images (keyboard shortcut cmd-i on my MacBook). Before printing them, I will make sure the image has lots of contrast, which helps to ensure a strong and defined cyanotype print. I usually duplicate the layer at least once on Photoshop and select the “overlay” blending option in the layers palette, so that the negative image consists of 2 or 3 layers on top of each other, meaning a denser, more contrasting image. When I’m happy with how the negative looks (as much as I can be at this stage!), I will print it onto inkjet transparency film. I often get asked about the one I use – I buy it from Amazon. It is a “micro porous” film and biodegradable (very important to me) – here is the link I use to purchase here in the UK. It may be different if you’re overseas, but if you search for “micro porous inkjet film”, hopefully you will find a similar product. It’s really important to choose a type of film which is compatible with your printer (inkjet or laser) – and of course, to make sure you print on the correct side – make sure you study the instructions on the pack before printing!


Once I have the negatives, it’s just a case of making the cyanotype prints (I use the phrase “just a case of…” very lightly as the whole process is fraught with frustration and potential failure – why am I so addicted??). For this project, I have chosen to work on squares of cotton calico, a 100% cotton fabric which is unbleached and undyed. I love the natural, creamy colour and the way it frays around the edges when I cut it roughly into squares – I feel this surface really suits the fragility of the subject which I’m trying to convey in the work. I apply the cyanotype light-sensitive emulsion to the fabric using a sponge applicator, dabbing firmly to ensure the surface is covered properly with no gaps in the woven texture of the fabric. I like to create “painterly” edges intentionally, as I think this adds to the feel of the piece, rather than attempting neat, straight edges. Once the fabric pieces are coated, the emulsion has to dry completely. This takes several hours (longer than on paper) and I’ve noticed the dry emulsion appears darker and greener than it does when I coat paper – has anyone else noticed this? If you’re wondering whether I mix my own cyanotype emulsion, the answer is no – I use the cyanotype kit from Jaquard Products – it’s so easy to mix and consistently produces good results.
When the emulsion is bone dry, the negatives are laid on top of the cotton squares and exposed to UV light – either in natural sunlight or with the use of a UV light exposure source. I often get asked about my little UV lightbox, which I use to print small pieces up to A5 size. I was lucky enough to find this one for £35 on Facebook marketplace – it’s definitely worth searching 2nd hand sources first, as the price difference is considerable between used and new (just type in UV lightbox or UV light exposure unit). It’s important to make sure the negative is pressed flat down onto the emulsioned fabric surface – if you’re exposing outside, lay out the fabric squares flat onto a sturdy board and place the negatives carefully on top, ensuring the image falls within the emulsioned area. Once everything is in position, you need to lay a sheet of heavy toughened glass over the entire board and fasten around the edge with clips. This ensures everything is kept flat and that the negatives are in full contact with the fabric. This same rule applies, whatever exposure method you are using. I’m now going to be very vague and unhelpful. You ask me: “how long should I expose for?” I answer: “how long’s a piece of string?” Honestly, exposure time really does vary, according to whether you’re exposing to sunlight (how strong is the sun? Is it cloudy?), or using another UV source (the strength of the bulbs or strips? Are you using a commercial unit or a home-made one?). For my unit which consists of 2 x 8w UV strips under a glass panel, I have been exposing the squares for anything from 4-6 minutes – it’s advisable to set a timer, if your source doesn’t have a built in one. In fairly strong sunlight outside, I’d go for 10 mins to start with, but based on results and/or weather conditions, you may have to either increase or reduce this.


Once the squares have been exposed with the negatives, I wash them thoroughly in a bath of clear water – and the “magical” (scientific really!) development process begins. With the fabric prints, I’ve found the washing stage takes longer than with prints on paper and I have to leave them soaking for anything up to 20 or 30 minutes. What to begin with seems like an over-exposed, “failed” print, mostly transforms into something rather lovely, after an extended soak – and so my “failure” rate so far has not been too bad. Completed prints need to be dried flat (the cotton calico has a habit of curling up when it’s dry!). I have been drying mine between 2 heavy boards, or by using my book press, but you can also iron them flat using a high heat setting on your iron.
As I mentioned in my last blog – if you’re interested in exploring different alternative printing processes, including cyanotype – I wholeheartedly recommend you sign up to the Alternative Processes Academy. I did just that last year and it turned out to be one of my best ever creative decisions 🙂
So – what are my plans for these? I have an idea to present them in groups, mounted onto boards. I’m not yet sure what type of background surface I see them on, I’ll need to experiment. I’ve had some wonderful suggestions from people about sewing them together, or embellishing them with embroidery…watch this space!
Leave a Reply